1、Gitee 上开启Pages #
具体过程不再描述,参考网上教程和官网说明
以下hugo安装过程参考了网上相关文章,但主题方面book的主题不是拿来即用,要看下主题的安装说明,否则有些迷糊。
2、安装 Hugo(windows环境) #
Windows 安装,前往 https://github.com/gohugoio/hugo/releases页面,下载 最新程序,解压得到 hugo.exe,将 hugo.exe 复制到本地建站目录。比如:
D:\hugo
Windows 用户 [cmder] 或 [Git-bash] 代替微软的 cmd.exe,这两个工具自带了 git ssh 等常用命令。
3、网站初始化 #
打开 [cmder] 或 [Git-bash] ,切换到hugo 工作目录
检查 Hugo 版本
hugo version
建立一个名为 tndyx 网站
hugo new site tndyx
hugo.exe 复制一份到新建的tndyx网站目录下(因为未将Hugo 添加到系统环境变量)
4、配置config.toml #
baseURL = "https://tndyx.gitee.io/"
languageCode = "zh-CN"
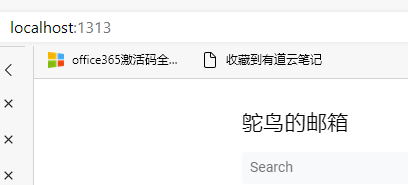
title = "鸵鸟的邮箱"
theme = "book"
## 保持分类的原始名字(false会做转小写处理)
preserveTaxonomyNames = true
## 是否禁止URL Path转小写
disablePathToLower = true
## 自动检测是否包含中文/日文/韩文,建议设置为true
hasCJKLanguage = true
## 摘要长度
summaryLength = 140
## 分页
paginate = 10
paginatePath = "page"
[author]
name = "鸵鸟的邮箱"
[params]
author = "鸵鸟的邮箱"
subtitle = "tndyx"
keywords = "tndyx"
description = "tndyx"
busuanzi = true
localSearch = true
5、添加一个主题(这里添加的是book主题,config.toml已进行了修改) #
git init git submodule add https://github.com/alex-shpak/hugo-book themes/book
6、运行网站测试 #
hugo server -D
打开 http://localhost:1313/
7、新建文章 #
book主题的有两个板块的内容,存放在content里,docs为分类文章内容,posts为博客内容。目录是自动生成,通过文件存放位置,及设置标题和权重形成侧边目录栏顺序及分层。
File tree menu (default)
By default, the theme will render pages from the content/docs section as a menu in a tree structure.
You can set title and weight in the front matter of pages to adjust the order and titles in the menu.
对于不想显示的文章可以通过属性隐藏。
bookHidden: true
8、对于单页面不需要编辑的,可以放在static文件夹下(此文件夹为存放照片等的),直接markdown引用,比图片引用级别高一级。 #
9、编译静态页面 #
hugo
10、利用git 推送到gitee #
具体详细流程参考本地项目上传到码云(gitee)远程仓库(图文详解) - 星空流年 - 博客园 (cnblogs.com),以下内容节选自此文,作为备份。
10.1 在本地对应盘符下面,新建文件夹,例如:F:\gitRemote
10.2点击新建的文件夹,右键点击 Git Bush Here
10.3输入 git init 命令,此命令主要是为了初始化一个 git 本地仓库,此命令运行完之后,会在本地创建一个 .git 的文件夹
10.4输入 git remote add origin 码云仓库地址 例如:
git remote add origin https://gitee.com/你的码云用户名/你创建的仓库名.git
10.5输入 git pull origin master 命令 ,这步的作用是:将码云上的仓库pull到本地你新建的文件夹中, 注:在此命令运行期间,可能会要求输入你码云的用户名和密码,正确输入即可
10.6将需要上传的文件添加到你新建的文件夹中,
10.7输入 git add . (. 表示所有的)或者 git add + 文件名 (此命令可以将文件保存到缓存区) 注意:不要忘记 敲空格
10.8输入 git commit -am “此处填写上传文件描述” ,此命令主要是为了添加文件描述
10.9输入 git push origin master ,将本地代码push到码云仓库
10.10 更新pages